Enable and disable Windows 11 hibernate mode
Enable Windows 11 hibernation mode (quick guide):
The Windows 11 hibernation mode makes it easy to boot-up your device quickly after turning it off. Unlike “Sleep” mode, it does not actually continue to use computer power. To turn “Hibernate” on or off, follow these steps (administrator privileges may be required):
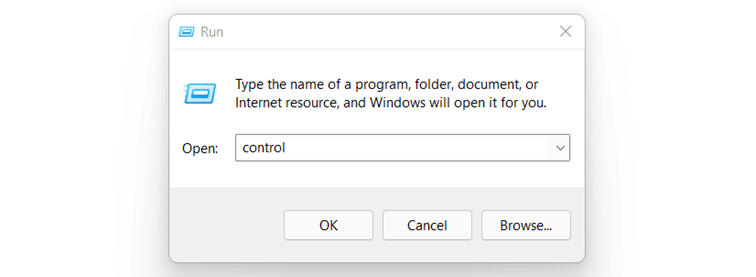
- Access the Control Panel. You can either use the search function in the Start menu or enter the command “control” in the “Run” dialog.
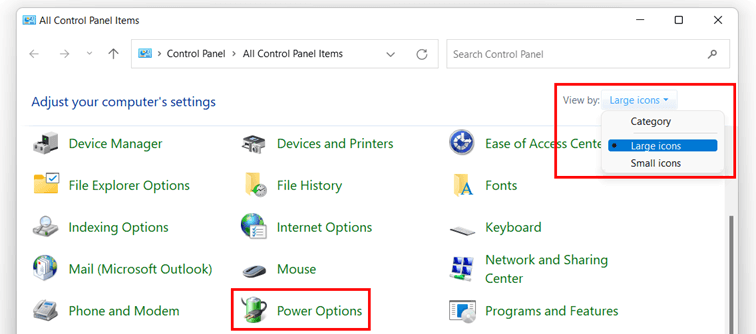
- Select the “Power options”.
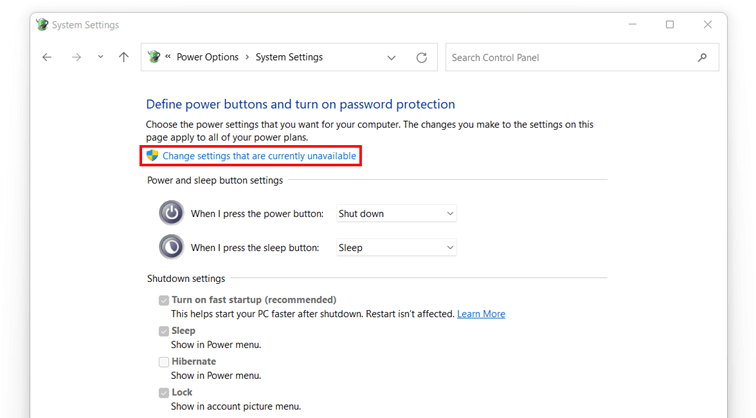
- Click on “Choose what the power buttons do” from the left-hand menu.
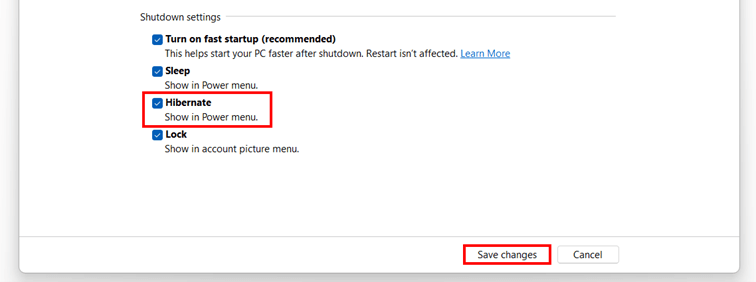
- Tick the “Hibernate” from the Shut-down settings menu. If the settings menu is grayed out, click on “Change settings that are currently unavailable” (requires administrator privileges).
- Launch the Start menu.
- Toggle the on/off switch and select “Hibernate” to enable the mode.
- Manage Windows 11 hibernate mode in the power options – here’s how:
- Just like Windows 10 hibernation mode, you launch Windows 11 hibernation via the corresponding “On/Off” button. By default, Windows 11 hibernate mode is disabled which is why you may not see the option immediately. However, you can activate the energy-saving options quickly and easily by following our step-by-step instructions below.
Step 1: Call system settings:
- To access power options, launch the Control Panel. First call up the Start menu or access the search function to search for the “Control Panel”.
- Alternatively, use the “Run” function by using the key combination [Windows] + [R] and enter “control”.
Step 2: Launch Power Options:
Step 3: Enable Windows 11 hibernation mode:
Step 4: Enable Hibernate:
- Once you’ve added the button to the power menu, you can put your device to sleep at any time. To do this, simply call up the Start menu and left click the “On/Off” button. You’ll now find “Hibernate” in the pop-up menu, among other options.
Tags
Tips-Tricks


Post a Comment
Make Valuable Comment: